Installing the Camera and Hardware
This guide will help you select the right location, install your Kingdom Metrics attendance-capture camera, and approve its placement — right from your phone.
⚠️ Important: The camera has a 180° horizontal and 55° vertical field of view. Proper placement ensures optimal coverage of your auditorium.
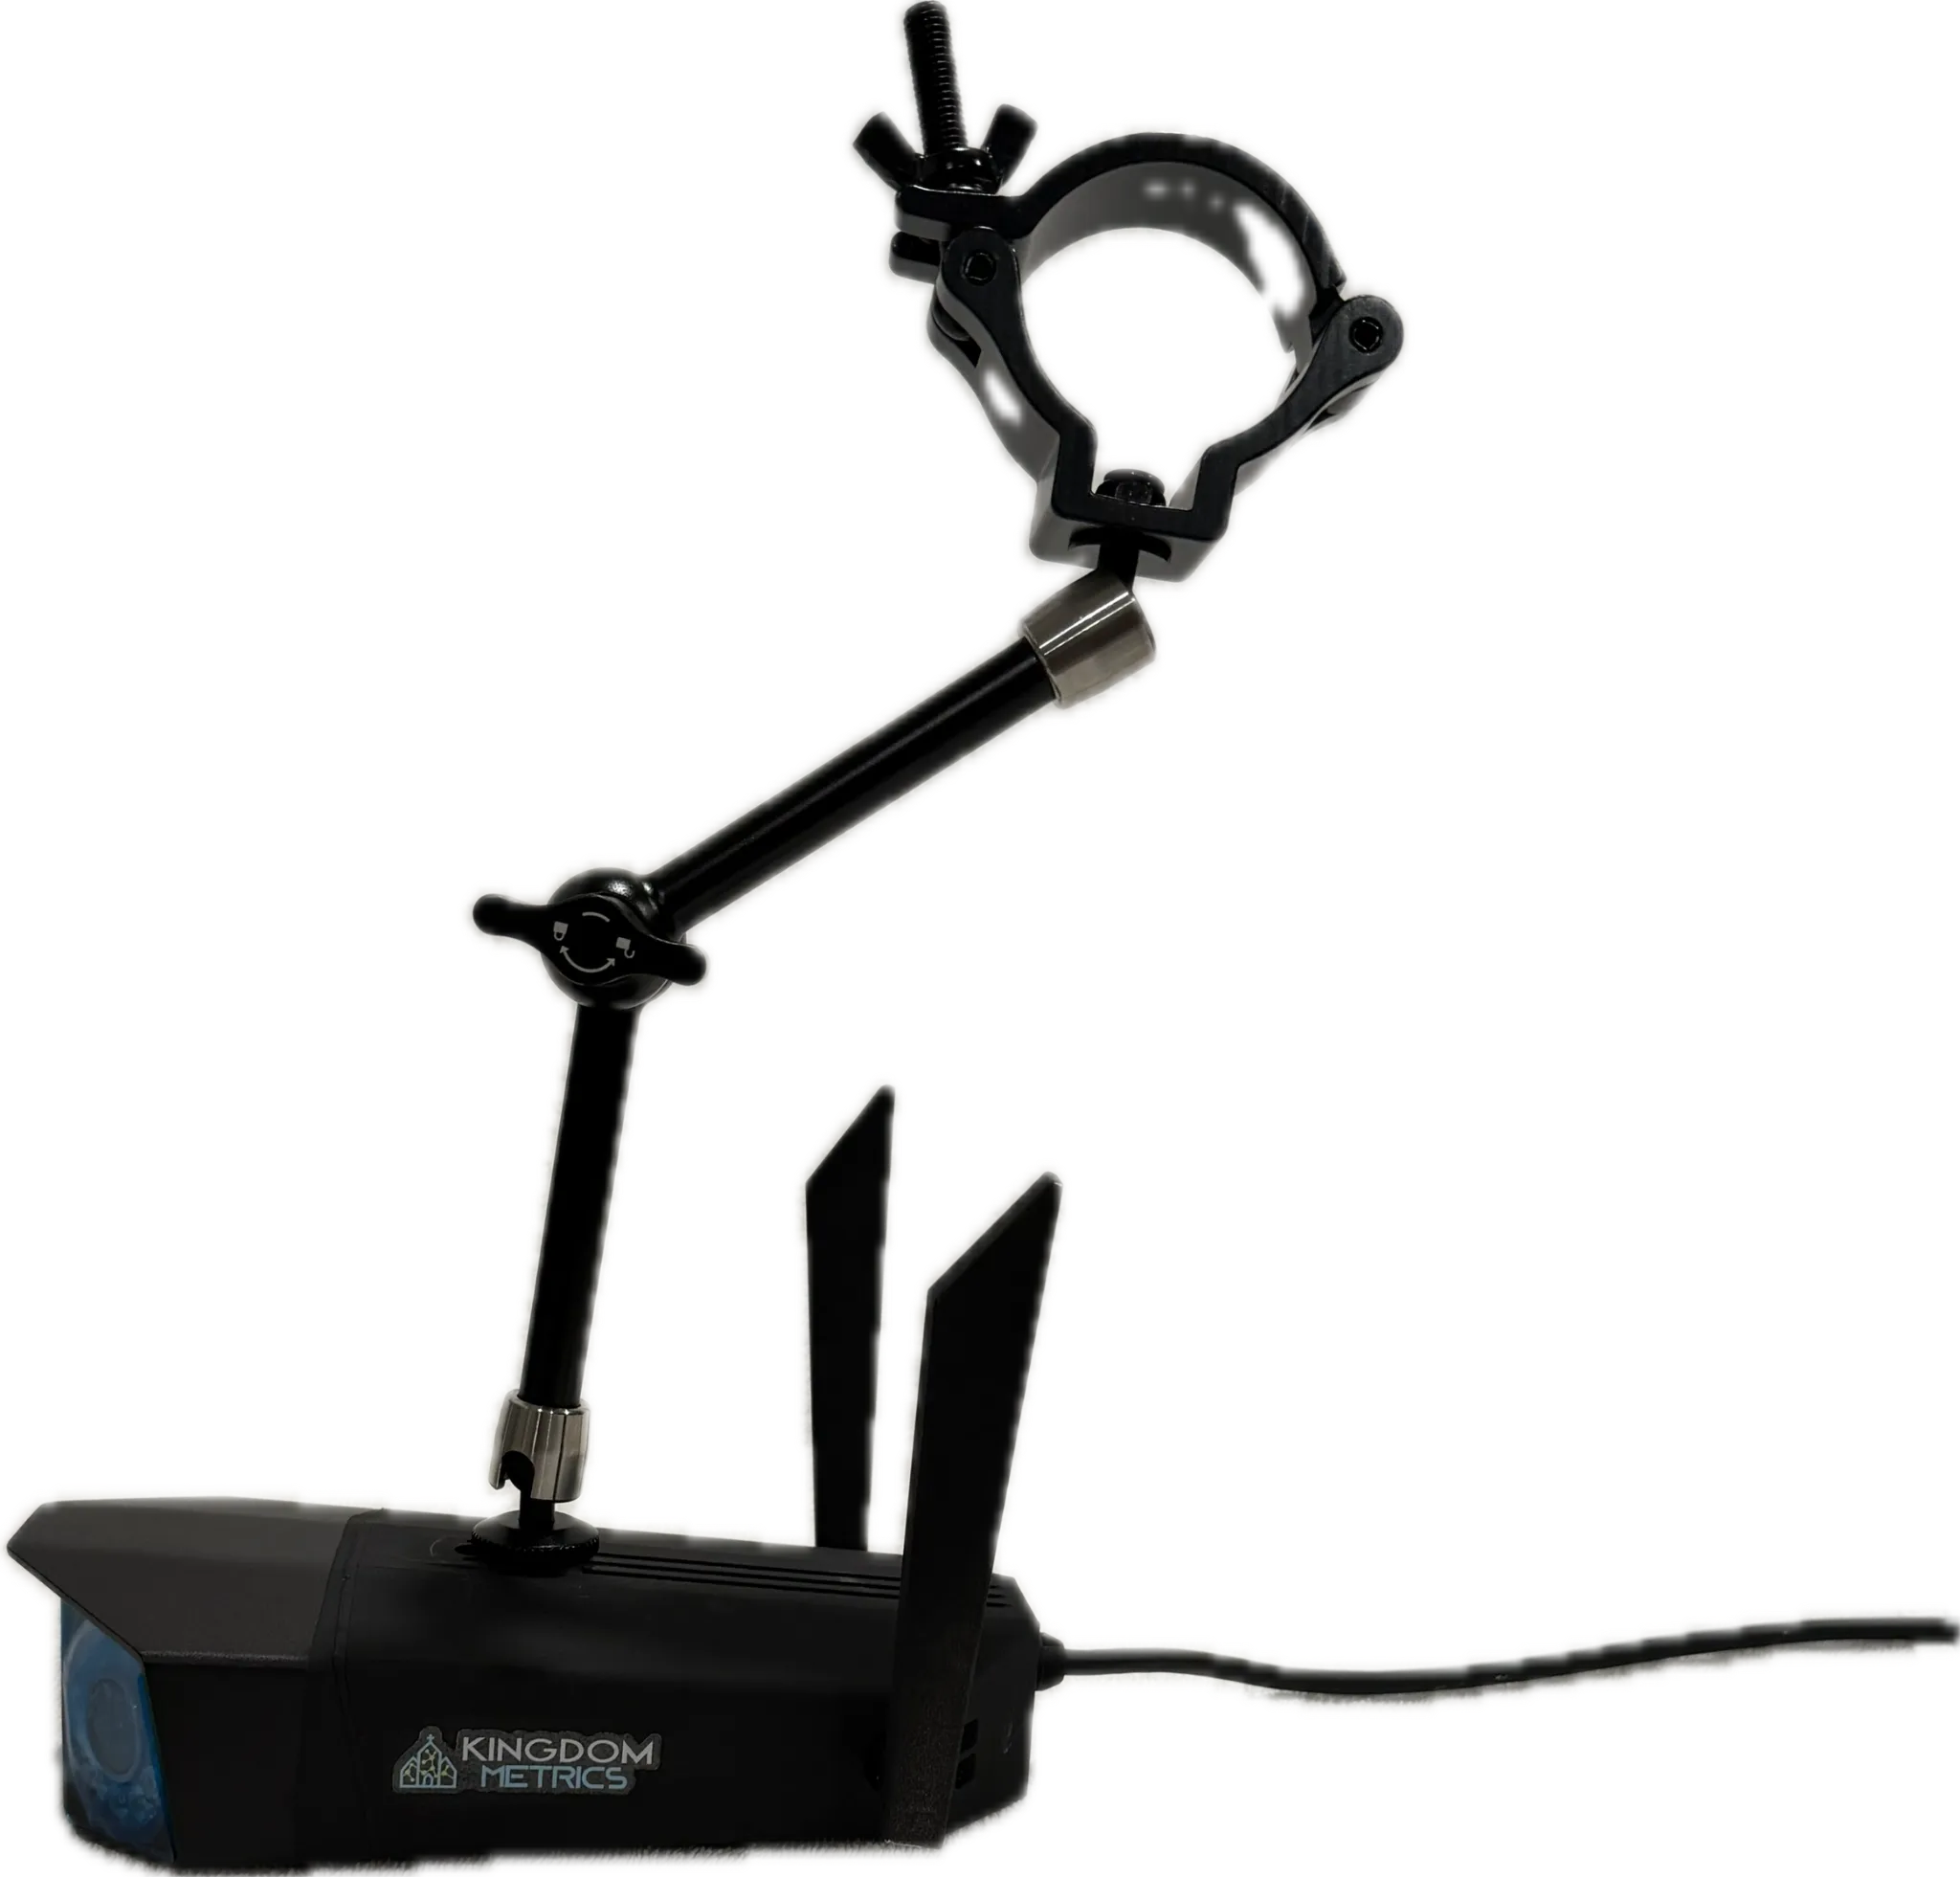
Option 1: Using Lighting Truss
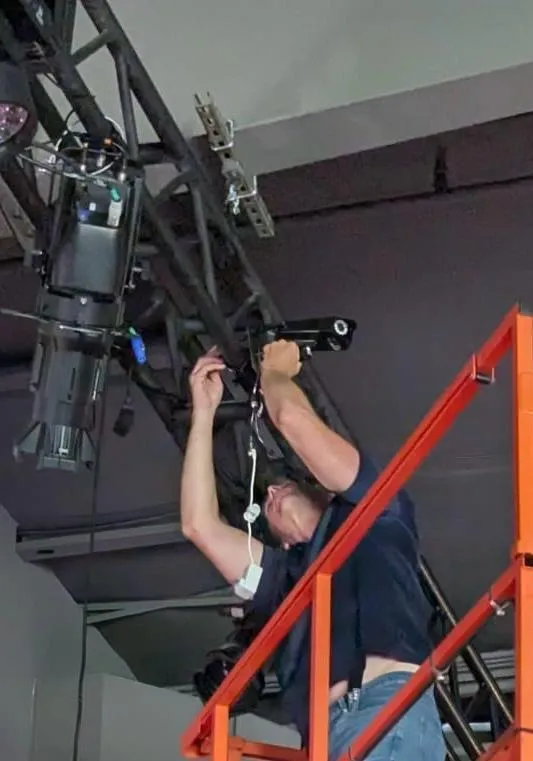
Step 1: Determine the Location
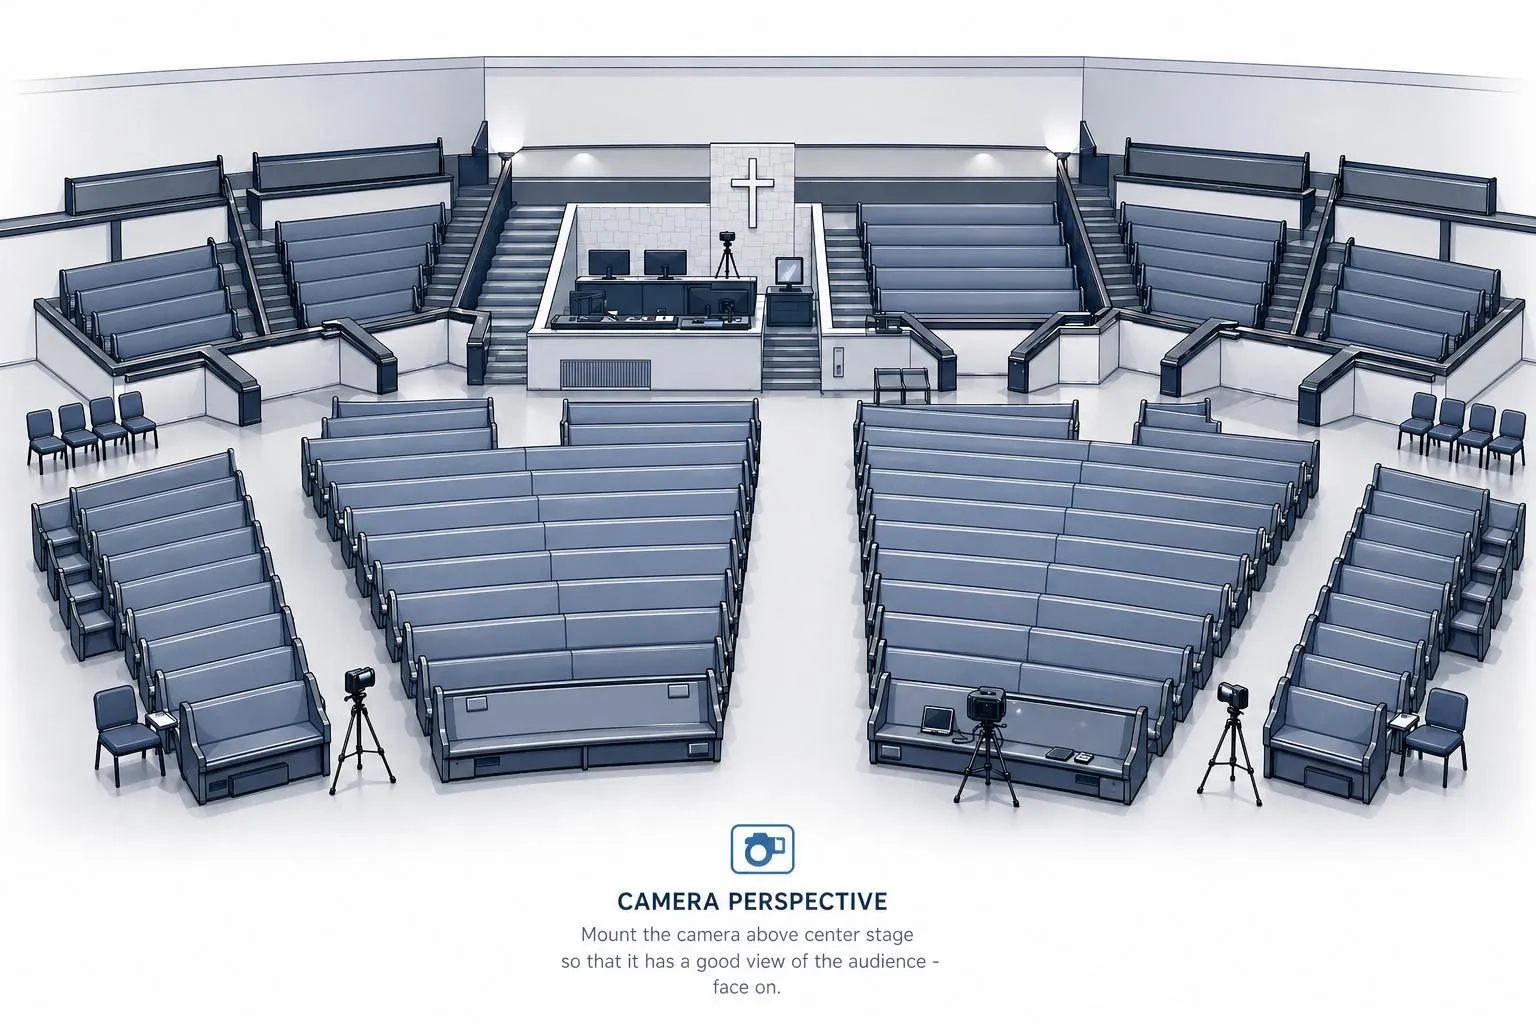
- The ideal location is above center stage on a lighting truss facing the audience.
- Make sure the camera has a clear, unobstructed view of the seating area.
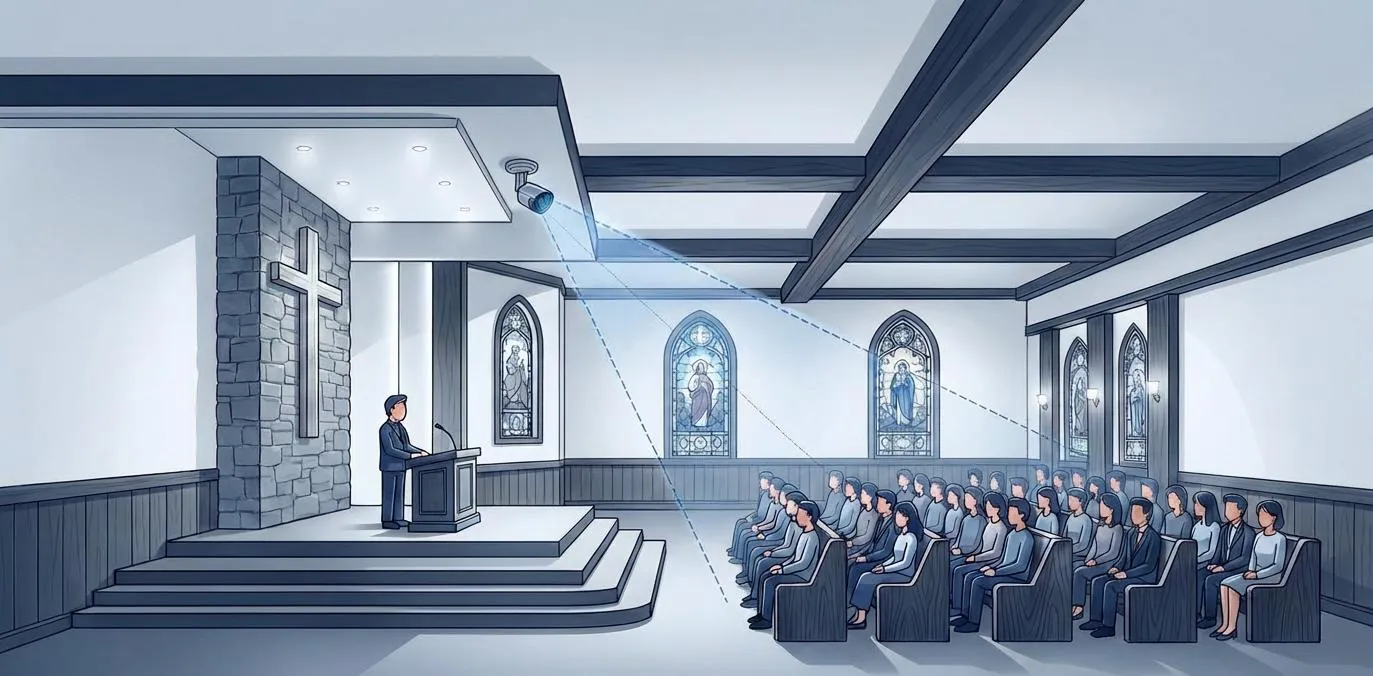
- Maintain awareness of the 180° × 55° coverage for optimal accuracy.
Step 2: Attach the Camera
- Attach the camera to the included truss arm. Note the arm can be attached to the top or bottom of the camera.
- Use the truss clamp of the truss arm to securely attach the camera to the truss.
- Unlock the arm and position the camera to have the best view of the audience.
- The truss arm is fully articulated and can be locked into any position.
-
Confirm that the camera is:
- Facing straight toward the audience
- Firmly secured with no wobble or tilt
- Clear of obstructions such as speakers, fans, lighting fixtures, etc.
- See images A & B below
Step 3: Plug in the Camera
- If you have a WiFi camera, attach the provided antenna "ears" to the left and right sides of the camera, then power it on with the provided power supply.
- If you have a PoE camera, simply plug the camera into your PoE-powered switch with an Ethernet cable.
- Once powered on, our system will discover and provision the camera — this can take up to 15 minutes. When provisioning completes, the floodlight on the front of the camera turns on and stays on. This is intentional — it's your cue that the camera is paired to your account, and it turns off once you approve placement in Step 4.
Step 4: Aim It & Approve Placement
- The moment your camera comes online, we'll email you a setup link — subject line: "aim it & approve placement."
- Open it on your phone for a live view from the camera. The first image takes about 15–20 seconds, then it updates every few seconds.
- Aim the camera so your seating area fills the frame, run through the on-page checklist, and tap Confirm Placement. You (or your installer) approve it — no waiting on us.
- Working with an installer or A/V tech? Forward the email — the link opens from any phone with no login needed.
- Approving placement turns the floodlight off and starts your ~2-week warm-up. After warm-up, your camera flips to Active automatically and weekly counts start sending to your Daily Digest recipients.
Option 2: Using Wall Mount
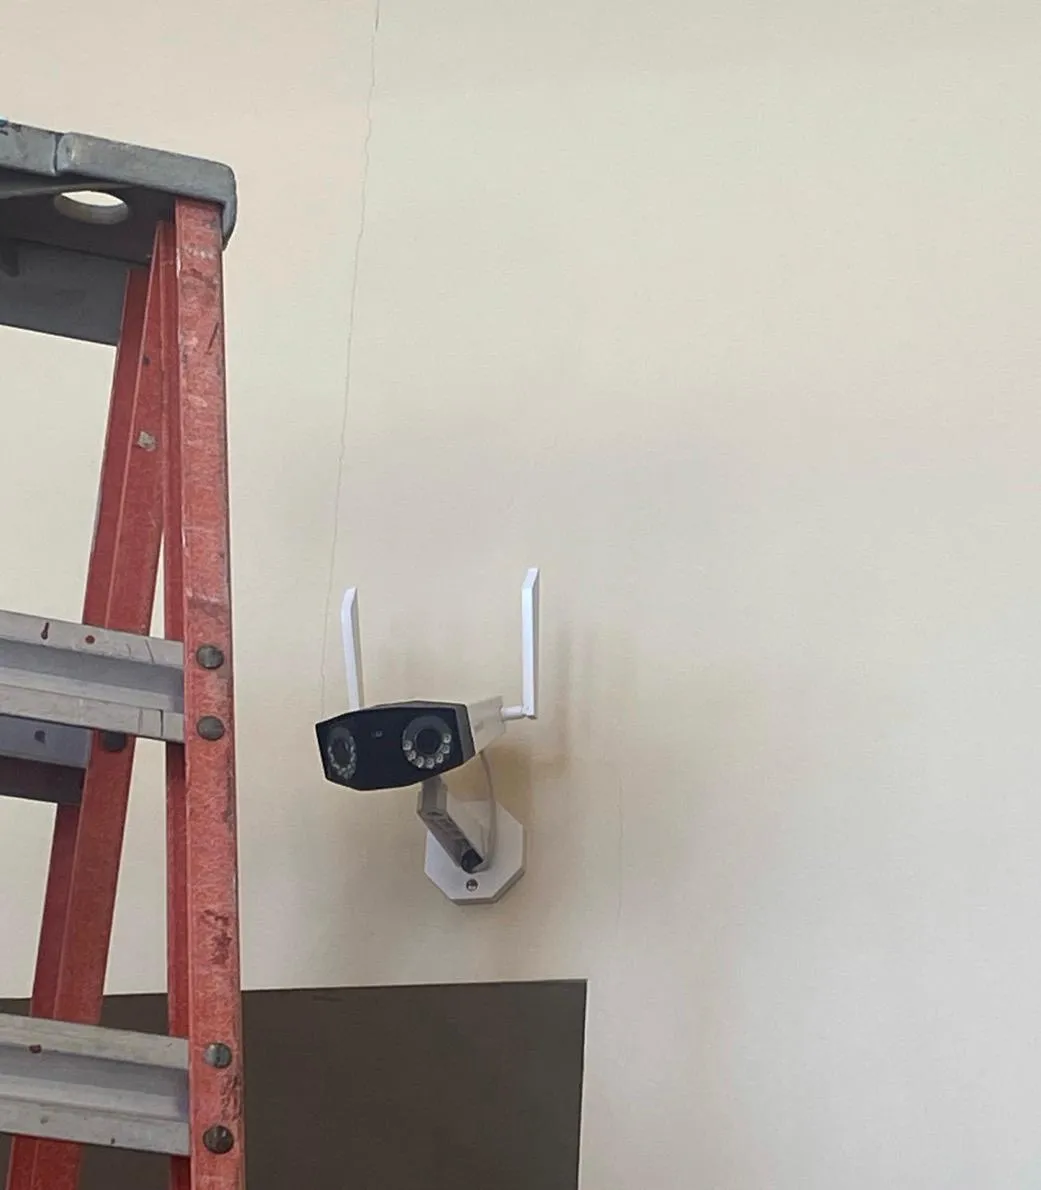
Step 1: Determine the Location
- The ideal location is on the back wall of the stage, typically centered.
- Side-wall mounting is also acceptable if the view of the audience remains clear.
- Maintain awareness of the 180° × 55° coverage for optimal accuracy.
Step 2: Attach the Camera
- Using the hardware provided, attach the silver camera mounting plate to the wall.
- Two drywall anchors and screws are provided for installation.
- Make sure the bracket is level and securely fastened.
- Attach the camera arm to the camera mounting plate and use the small screw to secure the arm to the plate.
- Attach the camera to the camera arm.
- Position the camera as best you can to have the best view of the audience.
-
Confirm that the camera is:
- Facing straight toward the audience
- Firmly secured with no wobble or tilt
- Clear of obstructions such as speakers, signs, etc.
- See images A & B below
Step 3: Plug in the Camera
- If you have a WiFi camera, attach the provided antenna "ears" to the left and right sides of the camera, then power it on with the provided power supply.
- If you have a PoE camera, simply plug the camera into your PoE-powered switch with an Ethernet cable.
- Once powered on, our system will discover and provision the camera — this can take up to 15 minutes. When provisioning completes, the floodlight on the front of the camera turns on and stays on. This is intentional — it's your cue that the camera is paired to your account, and it turns off once you approve placement in Step 4.
Step 4: Aim It & Approve Placement
- The moment your camera comes online, we'll email you a setup link — subject line: "aim it & approve placement."
- Open it on your phone for a live view from the camera. The first image takes about 15–20 seconds, then it updates every few seconds.
- Aim the camera so your seating area fills the frame, run through the on-page checklist, and tap Confirm Placement. You (or your installer) approve it — no waiting on us.
- Working with an installer or A/V tech? Forward the email — the link opens from any phone with no login needed.
- Approving placement turns the floodlight off and starts your ~2-week warm-up. After warm-up, your camera flips to Active automatically and weekly counts start sending to your Daily Digest recipients.
Reference Images
Troubleshooting
Most installs go from "plugged in" to "aim it & approve" in under fifteen minutes. When one doesn't, it is almost always one of the five things below. If you are installing on behalf of a church, this section is your cheat sheet too.
Plugged in, but no floodlight after 15 minutes
- PoE camera: the port has to supply power, not just data. Try a port you know powers another device, and try a different cable — a dead port or a bad run is the most common cause we see.
- WiFi camera: check the antenna "ears" are seated, the power supply is in a live outlet, and the camera is within reach of the WiFi network you gave us on the site survey.
- If the WiFi name or password has changed since your site survey, tell us — the camera is still looking for the old one.
- Give it the full fifteen minutes. The floodlight turning on and staying on is the cue that the camera is paired to your account.
Floodlight is on, but no "aim it & approve" email
- Check spam and promotions folders. The email goes to the address from your intake form.
- Working with an installer or A/V tech? Forward the email — the link opens from any phone, no login.
- Nothing within an hour of the floodlight coming on? Email us with your church name and we'll send the link by hand.
The setup link expired or won't open
- Setup links are time-limited on purpose. Reply to the email or contact support and we'll send a fresh one — it takes a minute.
- The live view can take 15–20 seconds for the first image. Give it that long before refreshing.
Camera came online, then went quiet
- WiFi: a camera at the edge of range will connect and drop. Moving the access point closer, or the camera toward it, fixes more of these than anything else.
- PoE: if the switch also powers lights or access points, it can run out of power budget on busy days. Ask your IT contact to check.
- A power cycle (unplug, wait ten seconds, plug back in) is safe at any time — the camera comes back to your account on its own.
Installing for someone else?
- Ask the church to forward you the "aim it & approve" email. Everything you need is behind that link.
- Keep this page open on your phone — it is the same guide our team works from.
- When in doubt, email support with the church name and what you are seeing. A photo of the mount and one of the switch port saves a round trip.
Need a hand?
Our team is happy to walk you through the install or help you get your camera placement dialed in. Stuck on something above? Say which step — we'll pick it up from there.
Email Support